
5 Must-Have Mods for your Revel 4X4
5 Must-Have Mods for your Revel 4X4
By: Kelly Laustsen & David Somach
About eight years ago, we started planning for what our parents term our "retirement preview." Fifteen months traveling around the United States and Canada exploring the outdoors, visiting friends and family, and seeing new places we might not otherwise visit. We both come from RVing families, with Kelly's dad and David's mom growing up traveling summers in a pop-up camper.
Our goal was to find something for our trip, but also something we could keep for weekend ski and bike adventures. So, we started going to RV shows and doing lots of research on camper options.
We quickly developed a few non-negotiables:
- 4x4 and no towing to get us up forest roads to reach hiking trailheads and to skiing destinations in the winter. We didn't want to be blocked by steep roads or have to worry about turning around in narrow locations. We also want to feel safe driving the worst road conditions in our vehicle.
- Short vehicle that we can parallel park on streets or in a parking lot when city exploring and can store it in our tiny driveway at home.
- Seating for four so friends can join us on trips and our vehicle can accommodate future kids.
- Shower and toilet so we can be fully contained whether backcountry camping or in a Walmart parking lot. Given we'll be in the vehicle full-time and active in the outdoors, we don't want to have to spend time hunting down showers.
We considered a lot of different options over the years while prepping for our trip, especially a truck camper or self-buildout of a Sprinter Van. However, we worried about having the time or skills to build out a van (especially while working full-time jobs) and we really liked the idea of a single vehicle where we could move directly from the front seats to the living area. When the Revel was unveiled and we stumbled across it during online researching, we immediately knew it was the vehicle for us.
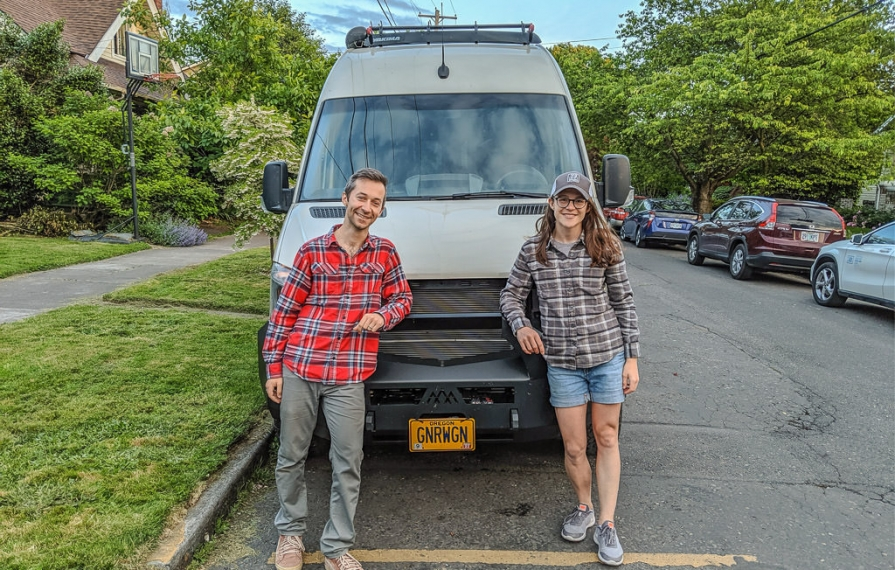
We picked up our Revel about a year before our trip started and did a number of weekend trips to test drive it before the big trip. We also connected with a lot of other Revel owners online--the community is very tight (check out the Winnebago Revel 4x4 and Revel Owners & Wannabees Facebook pages if you want to learn more)! Based on our own experiences and examples from other Revelers, we made a number of other enhancements to fit our specific needs.
Here are our 5 Must-Have Mods for the Revel:
1. Cargo Box and Additional Solar
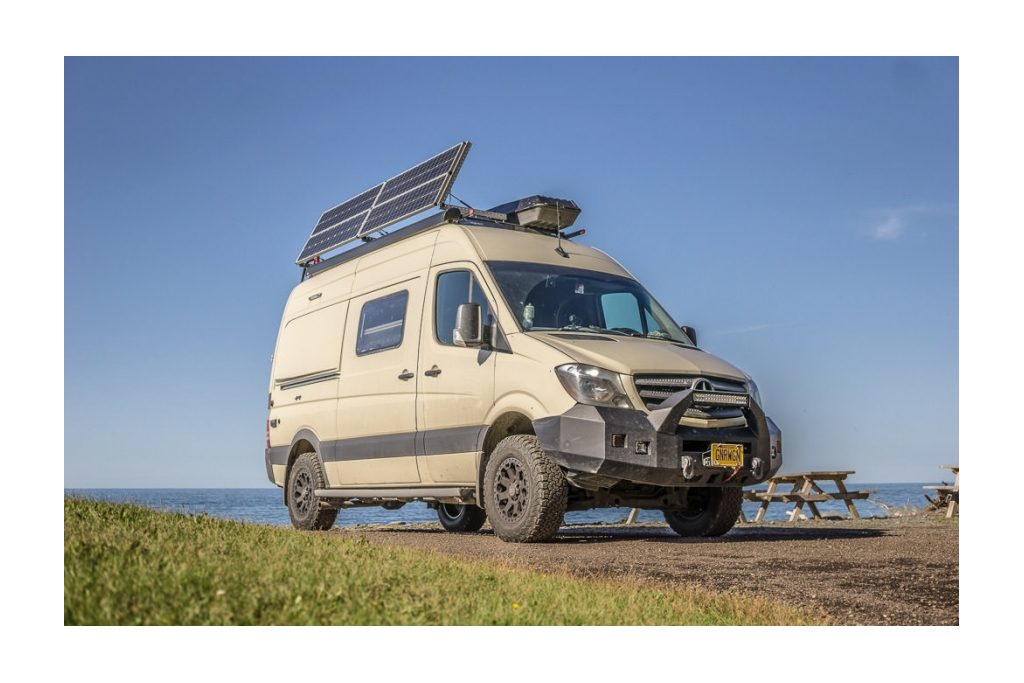
The Revel came with a roof rack and two solar panels, along with an exhaust fan and air conditioner (the A/C was an option we picked). We knew right away that we wanted to add a roof box, as we've used one for years in the winter to keep our wet skis out of the car. We found a roof box that would fit with the fan and A/C, but it would have shaded the existing solar panels. So, we took this as an opportunity to swap out the two solar panels for four long and skinny panels. This increased our wattage and worked with the roof box.
The roof rack is very adaptable with movable crossbars that have T-tracks for easy mounting. We also really appreciated that the Revel came with a Zamp 3-port roof cap, making this modification pretty straightforward since no new wiring had to be run into the van. We decided to take it to the next level by adding a pneumatic tilt system to the panels to be able to angle them and increase their efficiency in the winter.
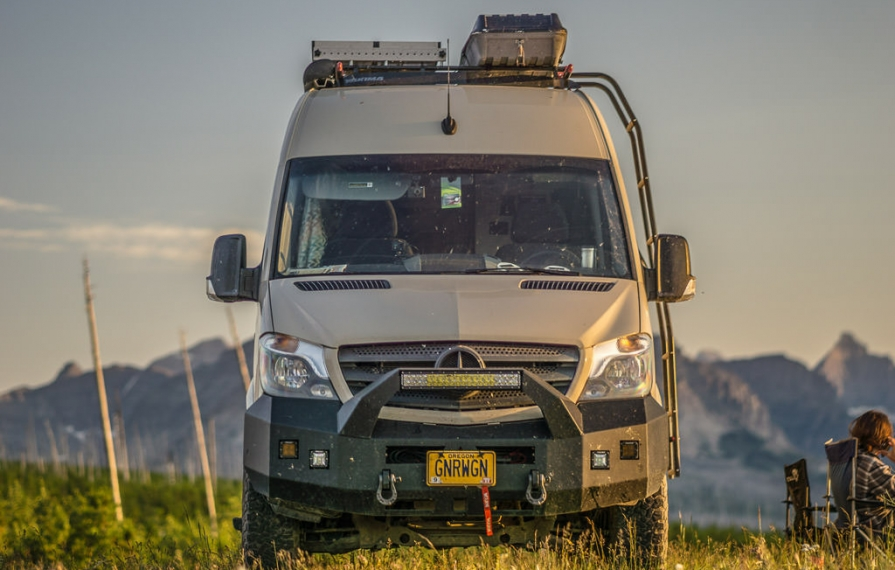
While we have only been on the road for the last few months of summer, we have had no problem charging our three house batteries up by noon on a sunny day. This leaves us carefree to cook on the induction stove, charge our many electronics, keep our food cold, and not worry how much we use the lights.
After figuring out where the roof box and panels would go, we realized that we had just enough space left to mount two recovery tracks and a shovel. We haven't gotten the van stuck yet, but it's only a matter of time. So, those self-rescue items were a must for us. It's great to be able to carry them outside of our van, and the roof is a great place for them given that they're bulky but light.
This mount also gave us a perfect location to mount the external antenna for our cell phone signal booster, which has been great for us; enabling us to stay connected to friends and family even in the most remote of backcountry spots.
Approximate Cost: $710 ($100 roof box, $360 4x80W solar panels, $80 2x Renogy Tilt Mounts, $170 fasteners + hardware)
Approximate Install Time: 32 hours (much less if done by a professional!)
2. Garage Space Storage
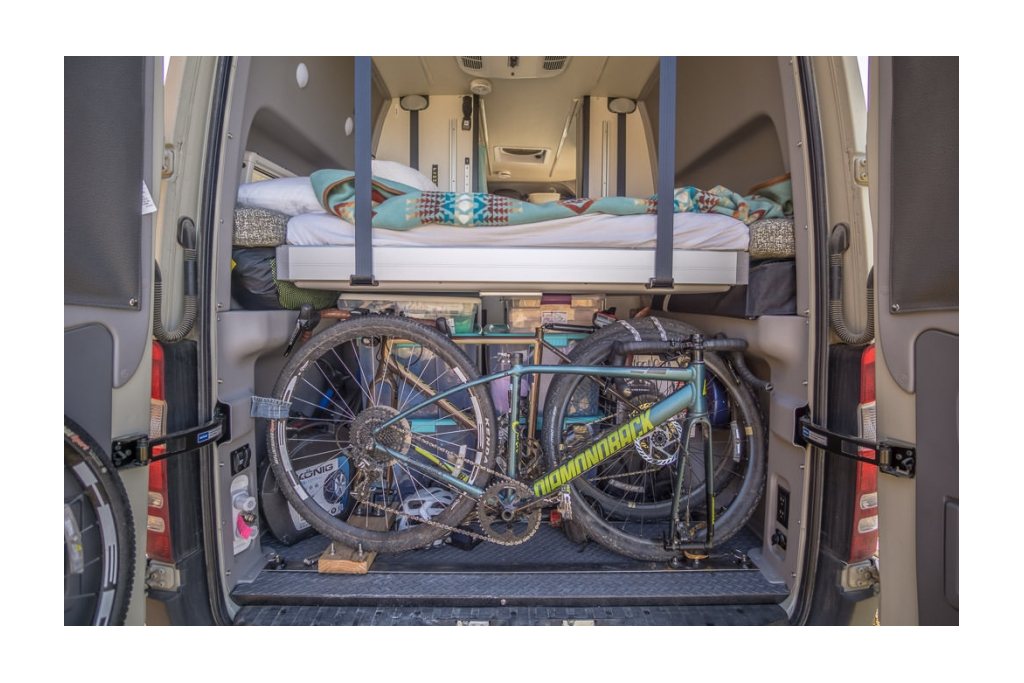
When we considered building out a van ourselves, we couldn't find a way to fit a reasonable-sized bed in a short-wheelbase Sprinter van while including a bathroom. The flares included in the Revel are the perfect solution, allowing the bed to be perpendicular to the van. The result is a comfy, livable bed and more living space inside the van for the kitchen, seating, and bathroom. To even better maximize the space, the bed is on a lift system so you can raise it up during the day to access under-bed storage.
This garage space (under the bed) is a blank canvas and we have seen other Revelers use it in lots of ways, including a variety of built-in shelves and even additional seats. We use the space to store our bikes and bins with our clothes, camping supplies, fire pit, toiletries, van supplies, etc.
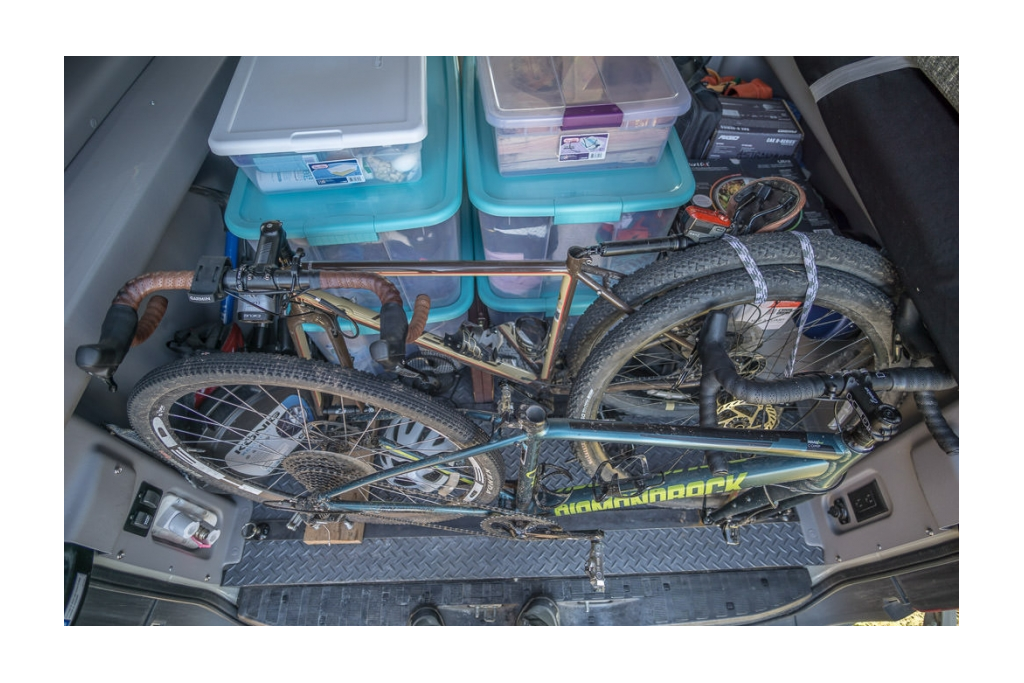
The van came with tie-downs along the sides of the garage area, which are easy to screw off. We used the tie-downs closest to the rear doors to mount a bike rack we fashioned out of a few pieces of steel flat bar and 2x4s from a hardware store and fork mounts we bought online. Having our bikes inside keeps them dry and avoids the extra length of a rear bike rack. We bought bins based on the width and height of the garage space, so we use almost every inch available!
Approximate Cost: $150 (Metal bars, wood, bins)
Approximate Time: 8 hours
3. Black-out Curtains
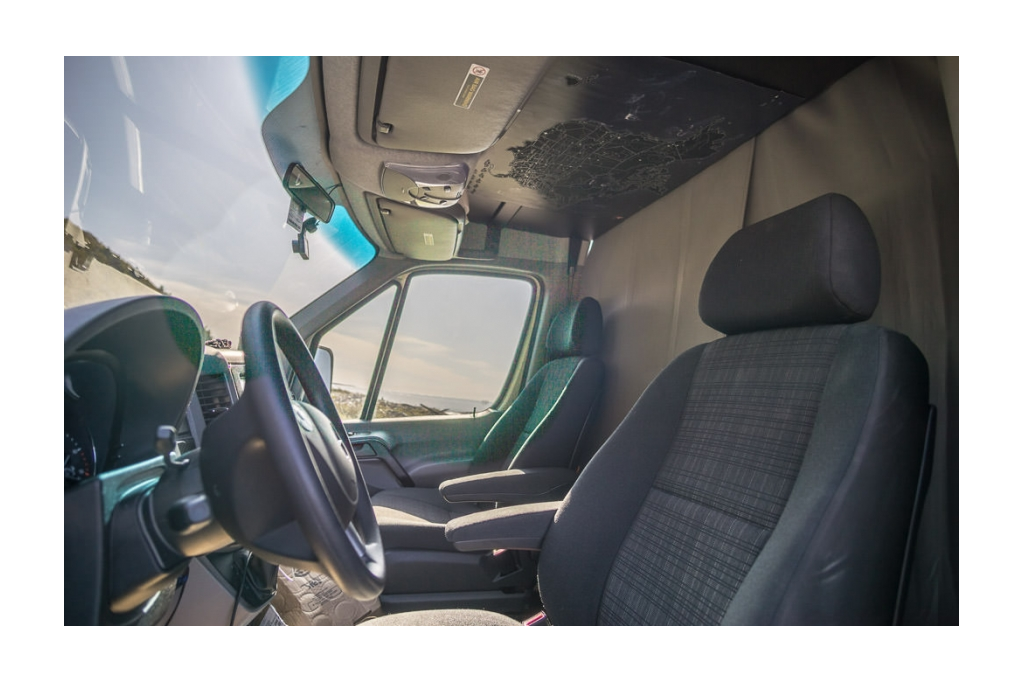
One of our favorite features the Revel came with is dual shades and screens on the windows, so it is super easy to open the windows while keeping bugs out or get a little extra privacy. However, the shades do let a little light in (and out). While this is fine at a campground, when urban camping we wanted a little more privacy. We also wanted a way to separate the cab from the living space to stay more undercover when camping in a city (and also deter theft if we leave the van parked for a day).
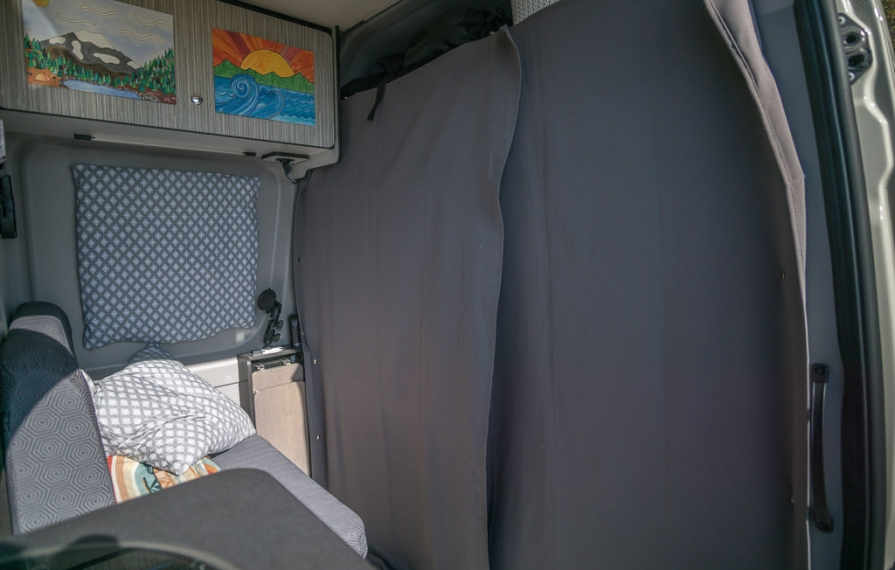
We started with the snaps already around the side door (for snap-on bug screens) and added snaps behind the driver's seat, using a kit from a hardware store. The snaps screw easily into the plastic, with a corresponding snap that can attach to fabric. We purchased black-out curtains intended for a set of doors, cut and sewed them to size, and installed the snaps to match with those in the van. The results are easy to put up and take down curtains that block out 99% of the light, and look nearly like a wall behind the seats in the cab. We also sewed curtains for the windows, using magnets and some adhesive tape to make them removable. It takes us less than five minutes to put all the curtains up at night, and even less to take them down in the morning.
Approximate Cost: $80 (Curtains, snaps, and fabric)
Approximate Time: 6 hours
4. Additional Pantry Shelves
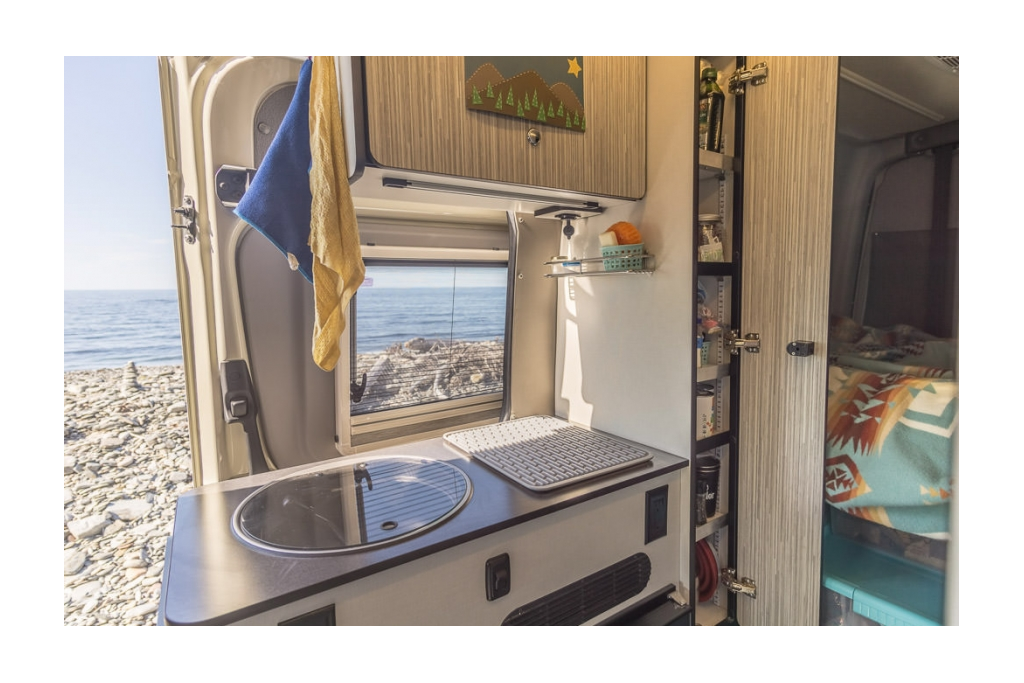
One of the easiest modifications we've made with a huge impact is adding more shelves to the pantry. We got the idea for this from a few other Revelers online, and were amazed at how easy it was to make a few additional shelves that look very similar to the original shelves.
Our pantry is packed full with food and dishes, so having five shelves lets us fit a lot more in. The shelves can be moved around, which lets us change up our organization when we want to.
Approximate Cost: $40
Approximate Time: 2 hours
5. Personal Touches
We like the clean look of the interior of the Revel, with wood-grain drawers and doors and a neutral color scheme. However, especially when your van is your home, it is important to add personal touches to make it your own. We sewed a cover for the bench seat, added our own artwork to the cabinets, and bought rugs for the kitchen area.
Approximate Cost: $100 (Fabric and rugs)
Approximate Time: 4 hours
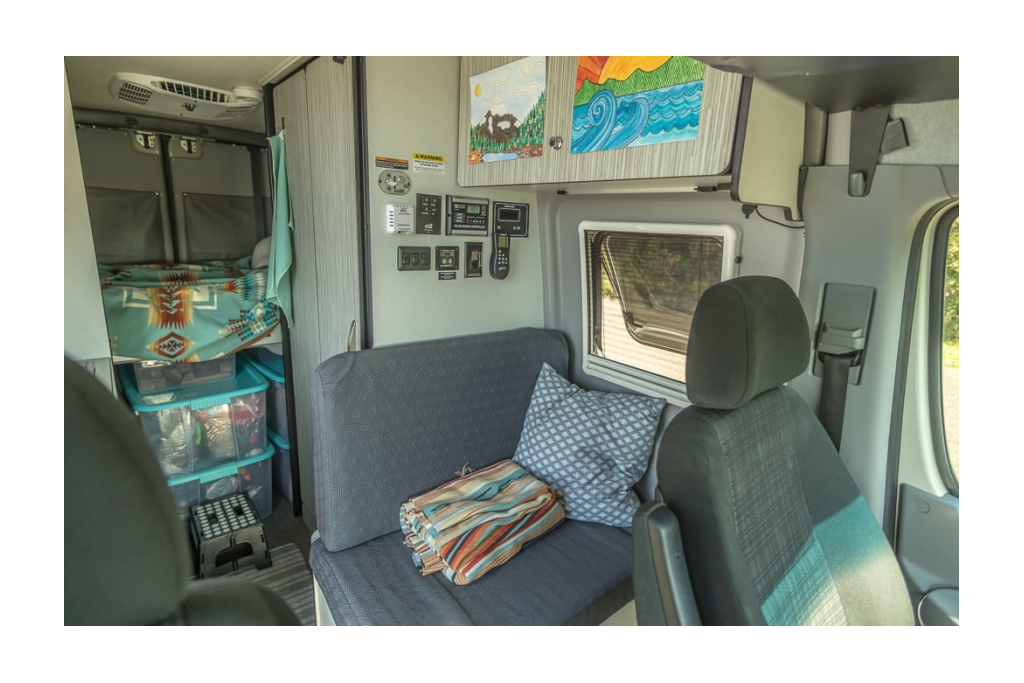
Now that we have been on the road for a few months, our Revel really feels like home. We are constantly amazed that our bed, kitchen, bathroom, bikes, and all our possessions can fit in a parking spot and make it to a trailhead. We love that it is just as capable on a busy city street as on a remote, rocky forest road.
We've been full-time adventurers since June 2019 and are excited for the next twelve months in our Revel! If you are interested in following along with our travels, you can read about them at HumansofGnarWagon.com, or view our Instagrams: @gnrwgn (focused on our van) and @humans.of.gnar.wagon (focused on our travels).

Have a favorite Revel or van mod of your own? Let us know in a comment below!
Comments
Comments on this post are moderated, so they will not appear instantly. All relevant questions and helpful notes are welcome! If you have a service inquiry or question related to your RV, please reach out to the customer care team directly using the phone numbers or contact form on this page .