
Setting Up a Travel Trailer for Towing: Gear & Tips
Setting Up a Travel Trailer for Towing: Gear & Tips
Steps to get your travel trailer ready to hit the road!
By: Bryanna Royal
As we explained in our previous posts, the first steps into moving into a travel trailer was picking out our trailer and tow vehicle. With that complete, it was time to get everything in place so that we could safely tow the trailer. Below are the steps we took to do that.
Note: These tips are from a Winnebago owner, and not from the company directly. You should always refer to your operator's manual for best practices.
Step 1: Selecting and adding a hitch receiver to the van.
We went online to eTrailer, which is a company we have purchased products from in the past and did some research, read reviews and selected the hitch receiver that would work with our vehicle. Their website was really helpful for finding a compatible hitch receiver since you just enter in your vehicle year, make, and model then they give you a list of compatible products you can purchase.
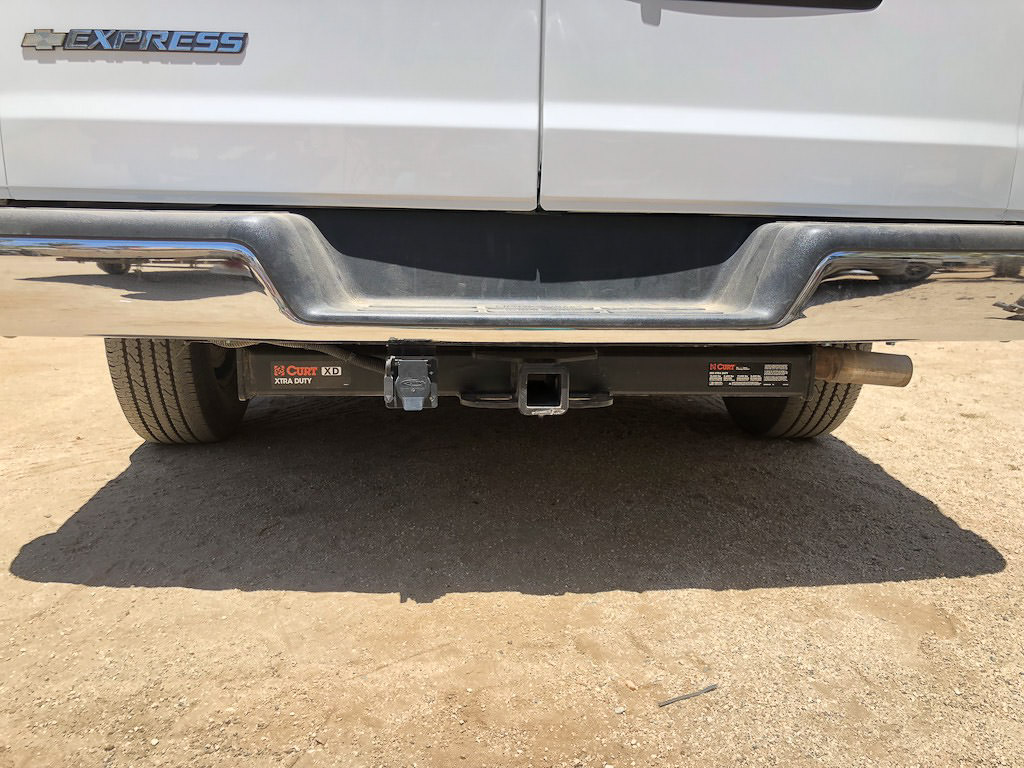
In the end we decided to go with a Curt XD Extra Duty hitch receiver which was rated for up to 17,000 lbs. This is more than double for our trailer weight. After having to deal with weight issues in our View, we wanted to make sure we didn't have to deal with it in our new van/trailer setup!
In full disclosure, we used eTrailer for our research, but actually ordered from Amazon since the receiver was less expensive there. It's always worth looking around at a few places for the best price.
Step 2: Selecting and getting the brake controller installed on the van.
In our research, we found there is only really one brand for brake controllers called Tekonsha. We had a Tekonsha Prodigy P2 on our View. So, we were familiar with that brand and model. We also found out that there was a new model out, so we went with that: the Tekonsha P3.
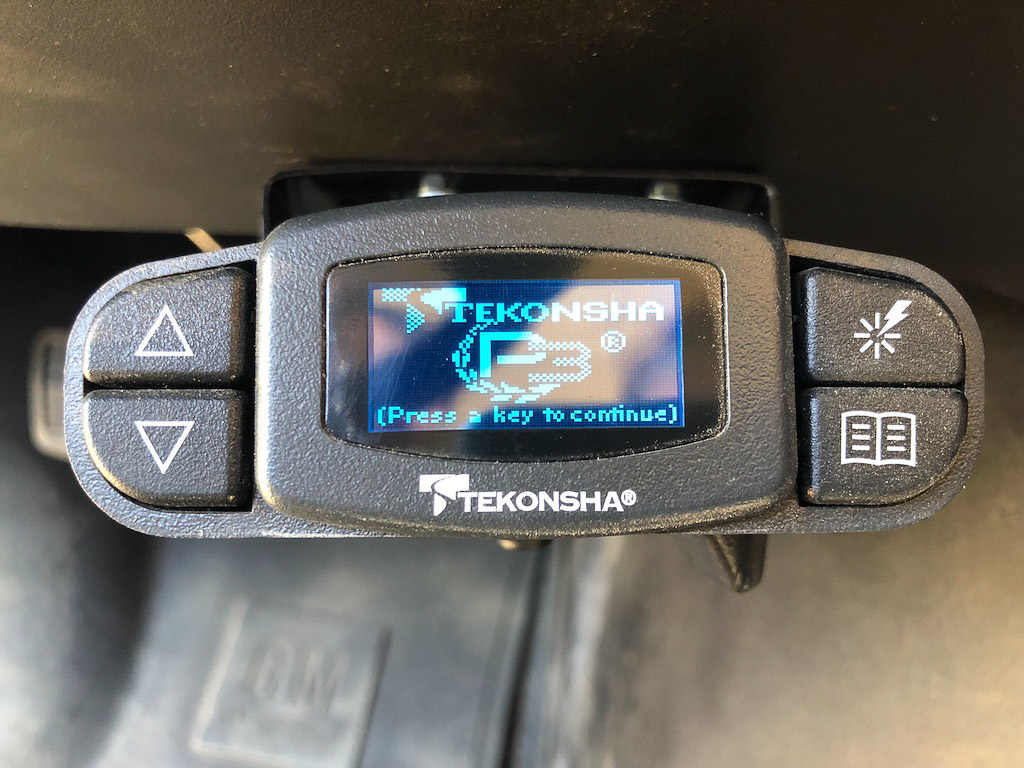
We ordered the brake controller from Amazon as well, but not the wiring kit. We had reached out to a local trailer supply shop that would install everything and they provided the wiring in their install package.
After the hitch receiver and brake controller were delivered from Amazon, we brought everything to the trailer supply shop and had them install it. The videos eTrailer provided on the products showed an easy to follow, step-by-step guide on how to install both the receiver and the brake controller. But the brake controller wiring was a bit more complex and I wanted that done right by a professional.
Step 3: Selecting and installing the hitch and sway bars for the trailer.
We had used a Blue Ox tow bar and base plate in the past with our diesel pusher motorhome and tow vehicle. We were very happy with the brand, so we knew we wanted to go with them again for our hitch.
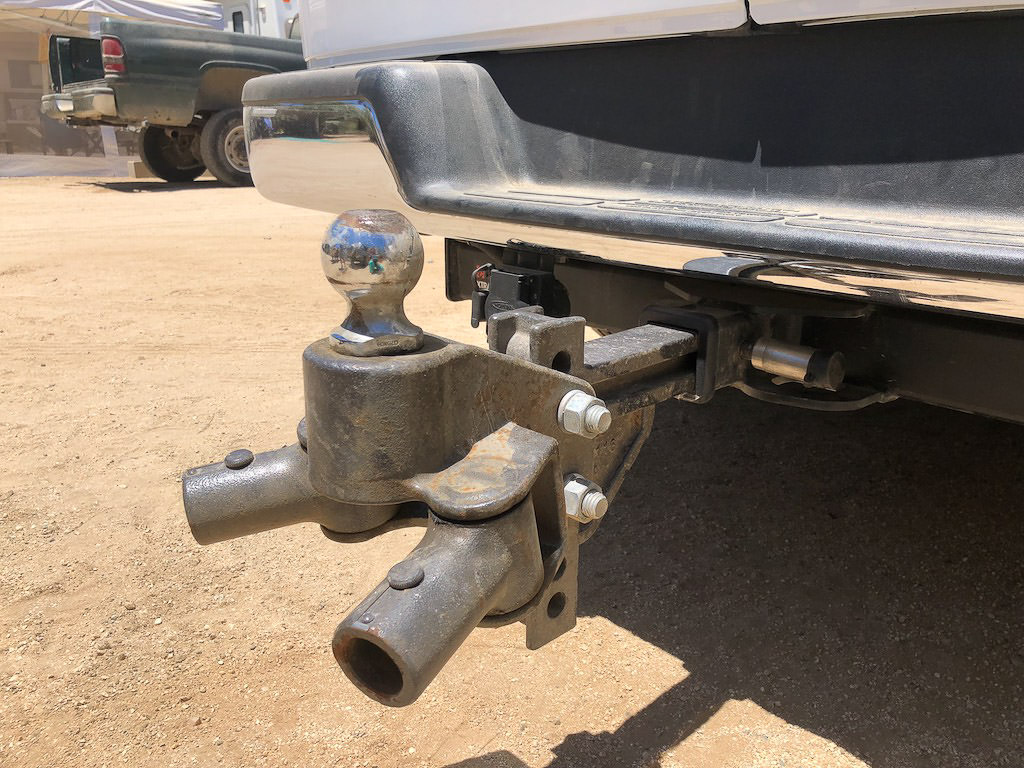
We also wanted to have anti-sway bars, which we had read really help with the control of your trailer while driving. A weight distributing hitch was on our list as well, which also helps with control and ease of towing. The Blue Ox SwayPro Weight Distributing Hitch met all of these needs.
The next step was determining the tongue weight of the trailer after it is fully loaded with all of our things. Based on that weight, we were going to select the right sway bars. When we went to do that, we realized we were on the edge of going to the next level up based on weight. So, Craig called Blue Ox's customer service department and talked to someone to make sure we selected the right one.
We were under the assumption it is always better to go heavier duty, but for the sway bars that was not the case. The customer service department explained that if you go too far over your weight, it will lead to a rougher ride since the sway bars are more rigid than you need.
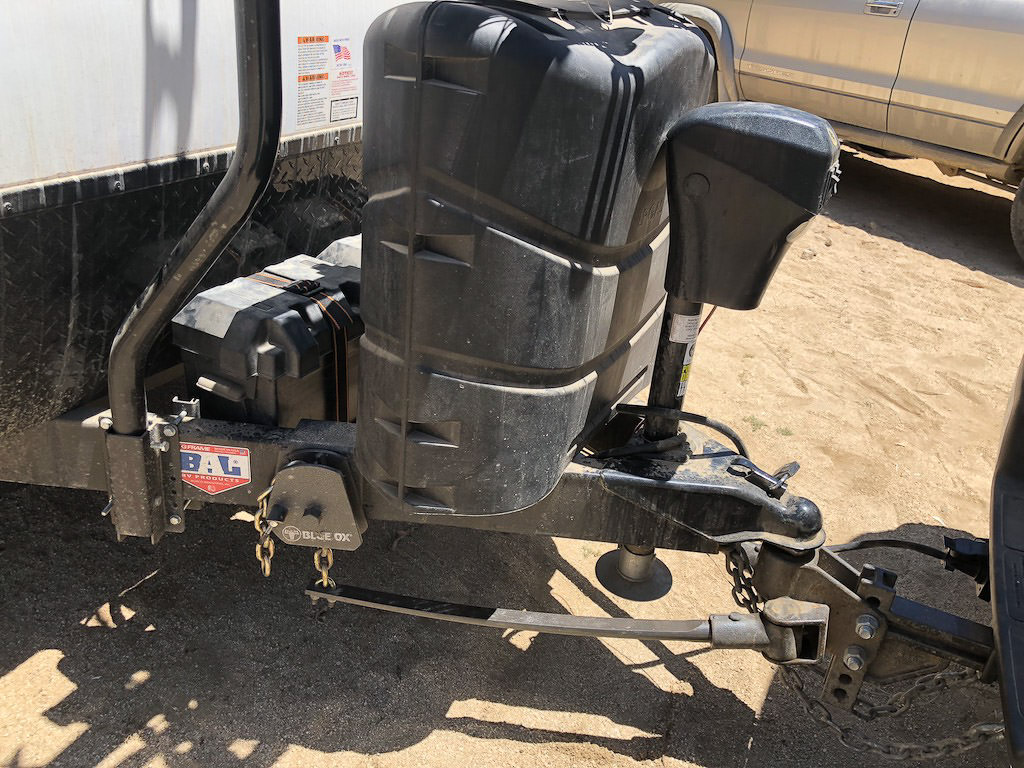
We trusted him and went with his recommendation. The next thing we had to consider was the height of the trailer tongue compared to the height of the hitch receiver on the van, to make sure the trailer is level while we are hooked up.
For this part, we relied on the dealer we bought the trailer from to select the right hitch drop based on the heights. They were able to do this when they were installing the hitch and sway bar hookups on the trailer. This is something important to consider when working with a dealership.
We had done our research on which hitch to purchase, so we knew what we needed. But we purchased the hitch setup through the dealer, so they could install it correctly for us based on all the heights and weight.
When putting a deal together for your trailer, be sure to have the conversation about including this in your trailer price or be sure to work out a good price on the install before you sign the papers! In some cases, the hitch may be included in the price of the trailer.
Another good part about the dealer installing it, was they installed the sway bar hookups in the right location and set the sway bars for the right weight for the trailer. They also showed us trailer newbies how to hook up the trailer, unhook the trailer and taught us what we needed to do with the sway bars.
Well, there you have it. Everything you need to get your trailer and tow vehicle setup and ready for the road! And, sorry for the dusty pictures. We are in Baja, Mexico, and dust and sand are everywhere!
For more tips for setting up your travel trailer to tow, read this guide.
Comments
Comments on this post are moderated, so they will not appear instantly. All relevant questions and helpful notes are welcome! If you have a service inquiry or question related to your RV, please reach out to the customer care team directly using the phone numbers or contact form on this page .