
Digitizing Your Family's Past
Last year, I was searching for pictures of my parents' RVs while working on a GoLife story and found them in one of the archive boxes we had in our storeroom. I knew which photos I wanted, but ended up spending the next couple of hours simply thumbing through RV travel photos my dad took over the years, smiling at the green shag carpet and seeing that some of the same campgrounds we stayed in forty years later hadn't changed one bit.

First RV experience in the summer of 1971. My parents rented this Cabana shown here at rest in Idaho Falls. In this, they experienced three blown tires and a nasty holding tank back up in Rawlins, Wyoming. Despite the experience, my parents would go on to own two motorhomes and log over 200,000 miles over two decades.
Getting Motivated
Like you, I've watched TV reports of fires creeping towards homes or long lines of hurricane evacuations. There's always the footage of people shoving personal belongings into the back of the car or truck, all of which leads to an oft-asked question: If you only had a few minutes to leave your home, what would you take? It's usually a very short list and almost always one of the answers is -- the photo albums. The one thing an insurance settlement can't provide for is paying for the recovery of precious lost memories.
Given that my interest in photography started back in elementary school, I guess that my deep affinity for the power of pictures has always driven my desire to keep and protect all our family photos. Couple that with getting older - when you start to see your life in a wider angle continuum where past generations and future generations can both be viewed at once - those boxes of memories that you've had sitting in the basement, attic or back closet suddenly become more valuable in their currency.
Somehow, through my life, circumstances unfolded that left me as the keeper of five generations of photos, documents, movies, and videos. Over the last three decades and four house moves, I would slowly sort, consolidate, de-frame, and label archive boxes of materials. In our last move, I placed all the photos, now roughly divided into expanding cardboard file pockets, into tightly sealed plastic archive containers. The collection filled twelve of these bins where I affixed large signs describing the contents and placed them on wire rack shelving I purchased for the storage room. They were reasonably protected, yet I worried. What if there was a pipe break? Or a fire? And what, hopefully, years from now, would our son make of all of these treasures that he would know little about and now be faced with figuring out where and how - or even if he should keep them.
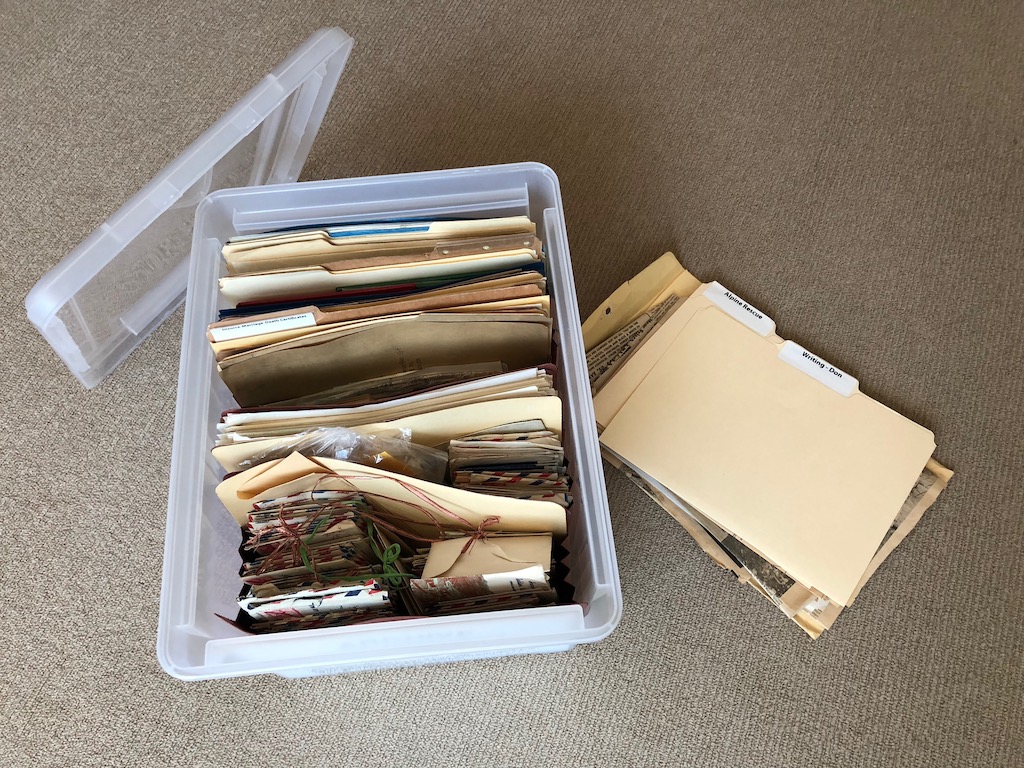
I bought a dozen of these plastic archive boxes from The Container Store. It's a good way to store precious memories. I used large filing pockets and folders to roughly organize photos and documents.
I had long ago determined that the best thing to do was to digitize it all, and over the years, not surprisingly, technologies and options improved. It was always going to be one of those retirement projects for long winter nights. Well, close. This summer it became an almost-retired, too hot to go out in the middle of the day summer project. Somewhere between the desire for digital archiving and the equal desire to continue with life simplification (less stuff!), I found myself popping the lid off the first box. Three months, and over 12,000 scans later I've done it! Five generations, twelve archive boxes, all backed up and reduced to the size of a thumbnail.
I don't think I can fully put words together that are powerful enough to explain what a fascinating and satisfying project this was. Nor could I have anticipated the new doors of discovery and learning that these photos and documents would open. This became less about preserving the past and more about richly understanding it. Not only for me, but my family and my relatives.
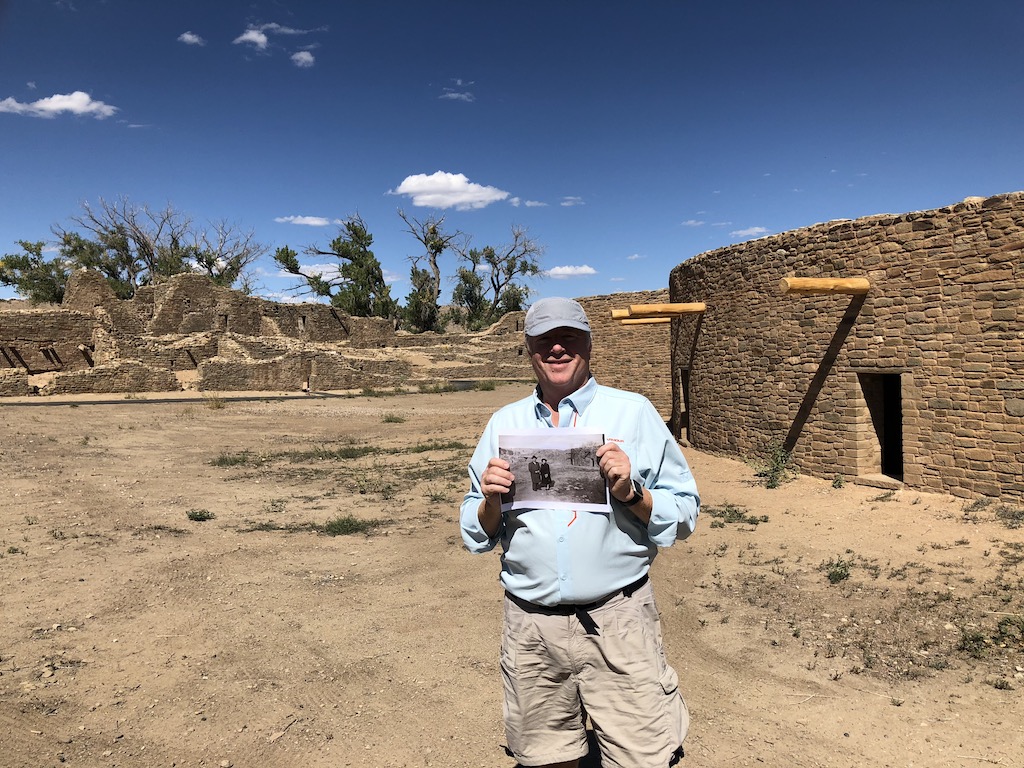
An old photo of my parents led me on a high-tech detective hunt to find where this picture was taken. You can read about that experience in this GoLife article.
As you think about digitizing your life you'll start realizing that you'll have photos of different sizes, newspaper clippings, slides, and videos. That means you'll need some different strategies and technologies for digitizing. You'll also want to think about how these digital files will be organized.
Tips for Digitizing Your Memories
File Naming & Formats
You want to make sure that the file formats you save in are standard, so that decades from now they can be viewed. That's why I picked the three most universal ones. The most common was JPEG, which is how I scanned the photos. For a few photos and documents, where I wanted super high resolution, I saved the files in the TIFF format (with smaller JPEG copies). For documents, I saved in the PDF format. PDFs can get huge and I used a small program to help reduce the file size. PDFs were perfect for saving the multi-page love letters my father wrote to my mother while stationed overseas during World War II. Each letter was saved as its own PDF, where I scanned the envelope with postmark and the multiple pages. Then, I put the date as part of the file name.
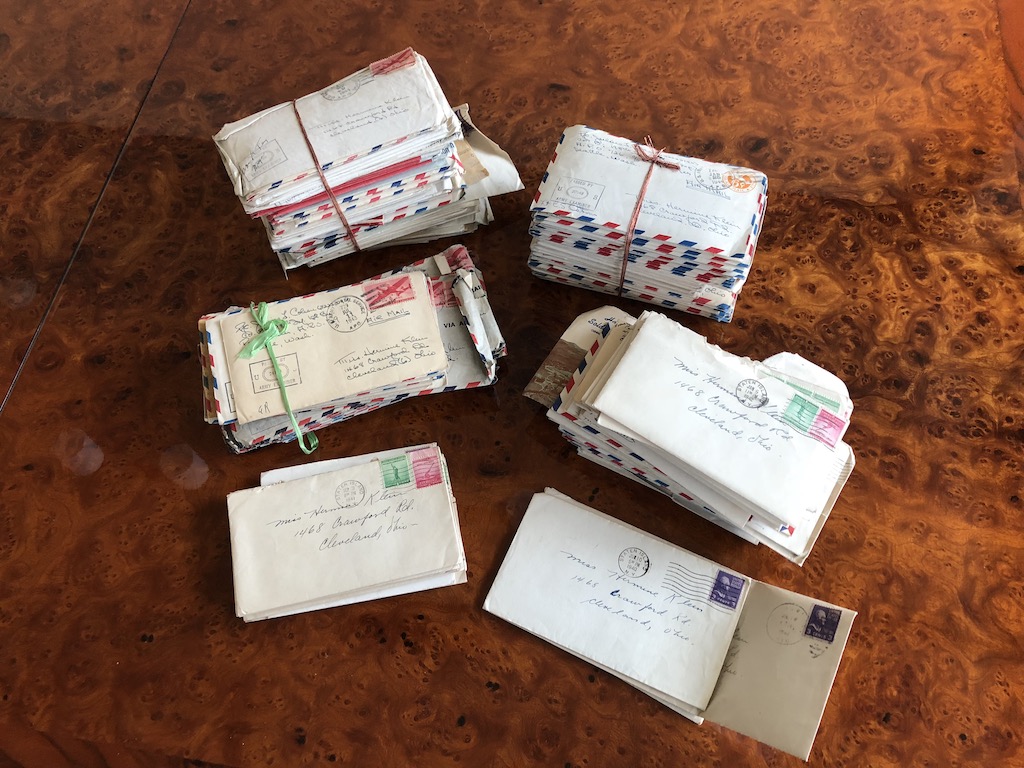
These stacks are every letter my mother saved that were sent by my dad during WW II over a period of two and a half years. He fought in the Aleutian Islands and these letters (some passages razor bladed out by military censors) tell the powerful story of how my parents went from friends to lovers, and ultimately marriage when Dad returned from overseas.
As I scanned envelopes and envelopes of snapshots, I saved them into folders with the month (or season) and year with a short description. A folder name might look like: 1986.4.22 Andy's Third Birthday. By using this system, as I built more and more folders of scans, they would sort in date order. Inside the folder, you can even go further in renaming the files to help you identify the photo and people in them. Many photo editing software programs will also allow you to save a meta-tag to a file, where you enter in a much more detailed description.
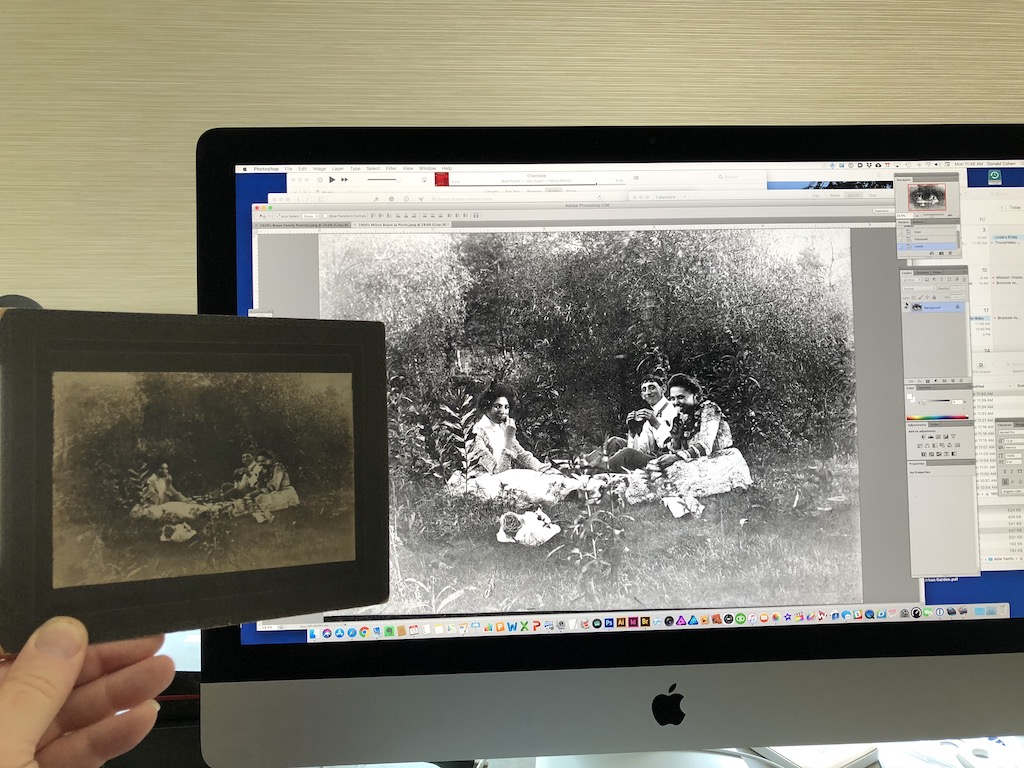
Tintypes were popular for casual photography in the late 19th and early 20th century. They tend to fade more than regular photographs, but Photoshop manipulation did a lot to restore this early 1900s photo of my great uncle with two young women on a picnic.
Scanning Hardware
If you have a lot of snapshots (and what parent of the 80's and 90's doesn't?) I highly recommend a snapshot scanner. Fujitsu and Epson are two good brands. After a lot of research, I bought an Epson Fast Foto. This is not a cheap scanner (around $550), but it's worth every cent I paid for it. Why? It sucks snapshots through at one a second at 300 dpi resolution and about two seconds for 600 dpi resolution. It also can scan both sides of the print at the same time to preserve any notes written on the back of the photo. It even handles 8 1/2 x 11 pages, which was awesome for papers I'd saved from my college days (and some of my mom's college assignments from the 1930's).
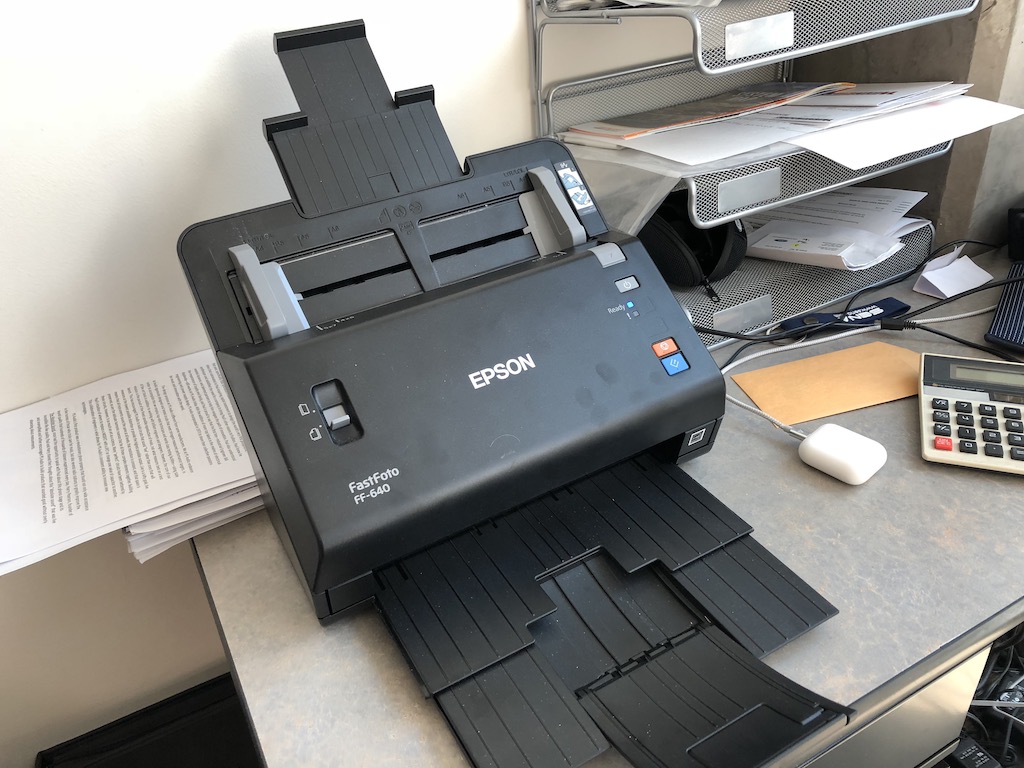
A workhorse. I'm not sure my huge scanning project could have been accomplished (with sanity intact) without this super-fast scanner.
You'll also need a flatbed scanner. If you have an all-in-one printer, you may already be good to go. In my case, I do have a Brother color laser with a document/flatbed scanner, but I decided that a separate flatbed, specifically the Epson V600 Photo (around $200) would be better because I also wanted to scan slides. The Epson can scan four slides or negatives at a time and does a very good job of it.
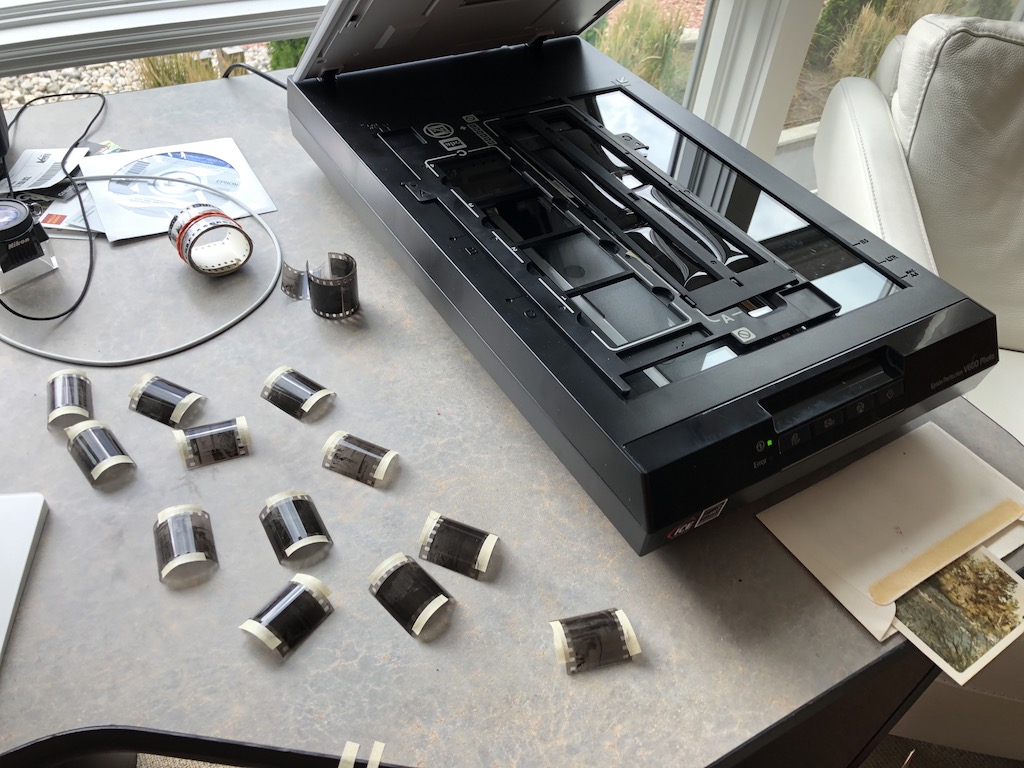
An all-around scanning champion. If you are only going to buy one scanner, the Epson V600 should be at the top of your list. Beyond flatbed scans of reflected material, it can also scan slides and negatives.
If you have several thousand snapshots, you really want to think about getting a super-fast scanner like the Epson Fast Foto. But if you only want to scan a few hundred photos, the V600 allows you to place numerous photos on the glass and then, in preview mode, draw a sizing box around each image. When you hit the scan button the V600 will scan and save each photo individually. There were countless times I used this feature, which was better than the fast scanner when I had a variety of different sized documents or photos.
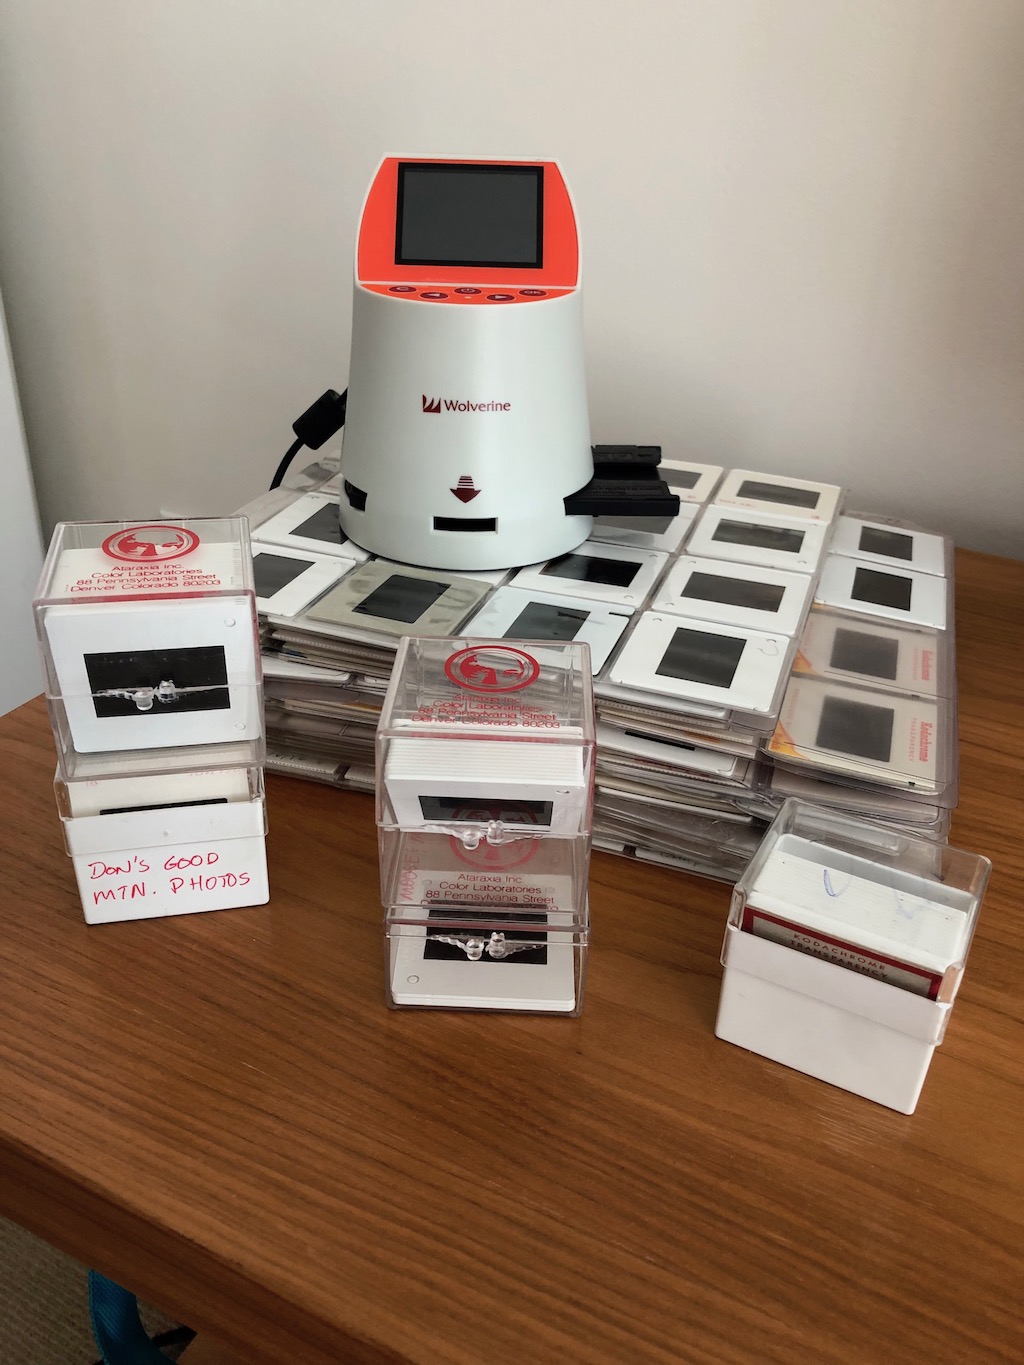
This Wolverine is fairly inexpensive ($125) and is essentially a digital camera. It does a reasonably good job of copying slides and it's pretty fast (you can scan about 30 per hour). However, its quality isn't as good as the much slower Epson V600 or a high-end scanning service.
Over-sized documents, such as newspapers, created a bigger challenge (literally). The V600 scan area is roughly 8 1/12 x 11 inches. So for some critical newspapers, I had to scan the page in 4 to 6 sections and then, assembled them into one page using a photo editor (I used Photoshop). This is very time consuming (30-60 minutes of file editing per page) and requires both experience and practice.
For some over-sized pages where I wanted a good image, but not quite as good as a flatbed scan, I laid out the document on the living room floor and took a picture. For copy photography, you want indirect (not direct) sunlight that is smooth and even. Standing over the document, I took a picture with my 20MP Sony camera. You could also use a high megapixel phone camera and still get pretty good results. This was perfect for junior high school programs and historical newspaper headlines.
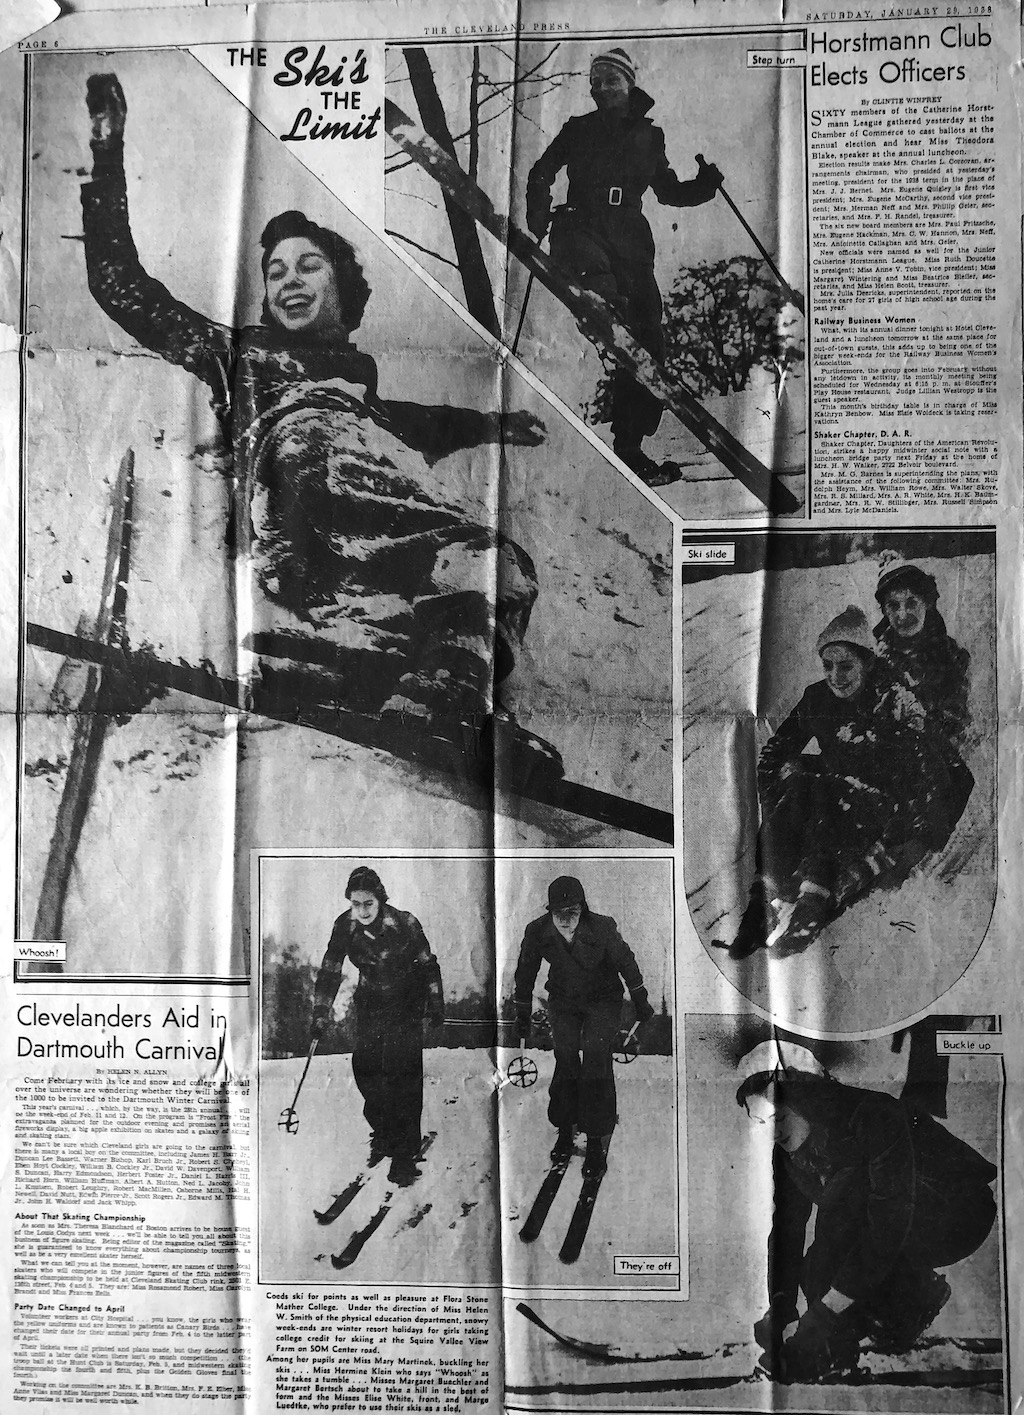
Here's a quick iPhone photo of an old newspaper featuring my mom (top left) in 1938. Using software, I eliminated the deep yellowing of age and improved the contrast.
Scanning Resolution
There's a tendency for people to think that the higher the resolution, the better the scan. While technically that's more or less true, scanning at too high a resolution is like over-watering the lawn. Scanning resolution is often described as dpi, which stands for dots-per-inch. There's also PPI (pixels-per-inch), but dpi seems to be the defacto standard both for electronic files and in the printing industry.
Here are some good rules of thumb:
- Photos and documents to be viewed on screen and printed at 5x7: 300 dpi
- Photos and documents to be printed at 8x10: 600 dpi
- Photos and documents to be printed at 16x20: 1,200 dpi
- Slides: 2,000 - 4,000 dpi
I ultimately scanned most snapshots at 300 dpi and some of the really important ones at 600 dpi. Out of 12,000+ images, I think that I only scanned less than 100 photos at 1,200 dpi. For all the slides I scanned myself, I went with 2,000 dpi - which looks very good on my 27" Mac screen and at 4K video resolution.
Scanning at higher resolutions dramatically slows scanning time and increases file size. And if a photo is a bit blurry, a high-res scan will not make it any sharper.
Software
I used a variety of software apps because there really isn't a one-size-fits-all solution. If you're on a Mac, the built-in programs called Preview and Image Capture are amazingly powerful. Epson also has software for their scanners (both Mac and PC), which can be very useful in batch naming and multiple-scan control.

I found this old processed roll of 35mm photos with a paper contact print which helped me match the negatives. The scan results were impressive on my Mac's 27" Retina display monitor.
For adjusting color and cropping, there are Mac and PC programs like Photoshop or Adobe Elements which will give you plenty of picture control. I found a small Mac app that reduced PDFs which, for $6, became indispensable. For managing and reviewing files and folders, the real bonus discovery was Adobe Bridge which is part of the very expensive Adobe Creative Suite, but can be downloaded and used for free. Yes, free. It's a fantastic value and great tool to have either on the Mac or the PC.
Scanning Services
I had 3,000 slides which I edited down to 600 keepers. I calculated that it would take me over 50+ hours, as each slide can take one to three minutes to scan. I also had hours of 8mm home movies which, years ago, I had transferred to VHS and subsequently had burnt DVDs of. I had long ago come to the conclusion that digitizing these kinds of media should be done outside.
There are many places, such as photo stores and Costco, that offer scanning services. However, I did a much deeper dive and carefully researched companies that specialized in scanning. One company that kept showing up in the top three of various reviews is a firm outside Phoenix called DigMyPics. Before I risked shipping off all the home movies, I sent DigMyPics one short 50' 8mm reel for a test. Within a couple of days, they had digitized it (their process does one frame at a time) and sent me a link for web review. It. Blew. Me. Away. Compared to the transfers I'd done in the early 80's, the color saturation and detail was fantastic.
I spent more than a thousand dollars having them digitize movies that went back to 1954. They sent them back on a hard drive (big files), but I could also download high-quality MP4 files from their server. The six hundred slides were $.40 cents a scan, looked great and had detail and tonal range better than even my good Epson V600 scans. DigMyPics clearly has figured out what an anxiety-producing experience shipping off your family treasures can be. To that end, their level of customer service really quelled my worries with their progress reporting. Depending on the amount of material you have, the whole process can take several weeks or more. I was thrilled with the outcome and very happy not to sit chained next to a slide scanner for weeks (with a bottle of Ibuprofen nearby). When it comes to precious family memories, use a good national scanning service.
After the Scanning
For me, my pre-digital scanning project ranged from the late 1880's up until my first Nikon Coolpix camera digital pictures in 2000. After that time, my world became completely digital. And that leads to a whole new conversation on organizing and archiving your digital life.
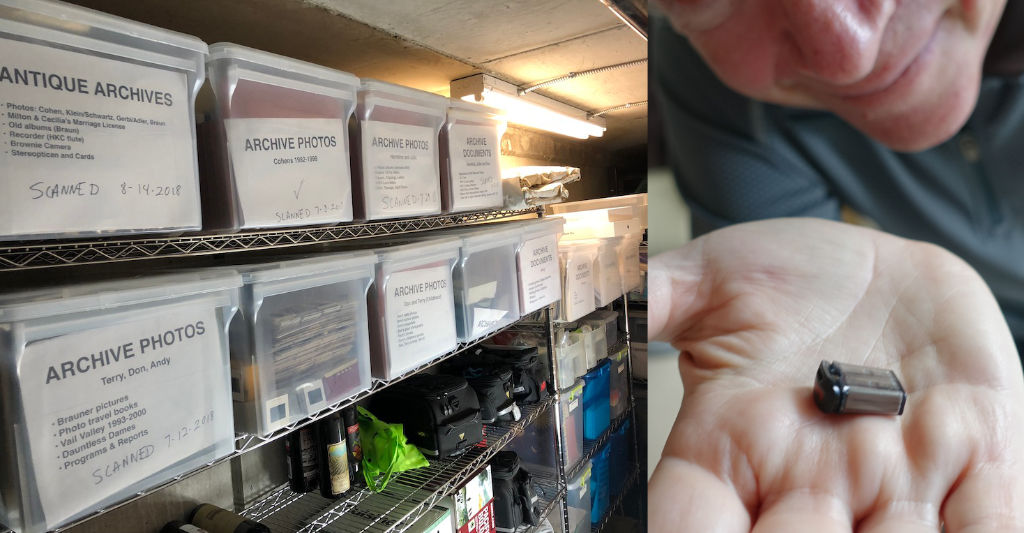
The ultimate space saver. Even as a hard case techie, I still marveled at reducing twelve stuffed archive bins to a memory stick the size of my thumbnail. Wow.
The same review, management, and archiving issues I've used in my digital life for nearly twenty years can now be applied to our new family scanned archives, which are all arranged and backed up. (Read this companion story on best digital storage strategies). All the truly irreplaceable family memories are safely preserved -- and now instantly accessible.
Flood? Fire? Earthquake? I laugh at your natural (or manmade) disasters!
Comments
Comments on this post are moderated, so they will not appear instantly. All relevant questions and helpful notes are welcome! If you have a service inquiry or question related to your RV, please reach out to the customer care team directly using the phone numbers or contact form on this page .